10 DIY Outdoor Toy Storage Ideas That Keep the Backyard Tidy — Brilliant, Space-Saving Hacks
You want a backyard that invites play, not a trip hazard. Drowning in pool noodles, balls, and toy trucks feels frustrating after every sunny afternoon, but you can fix it with simple, sturdy solutions that fit your space and budget. You’ll learn practical DIY ideas that protect toys from weather, speed up cleanup, and keep your outdoor space ready for fun.
An experienced DIYer’s voice will guide you through projects that range from quick wall racks to more built-in storage options, plus tips to avoid common mistakes like poor drainage or flimsy hinges. Expect clear how-to intent, smart material choices, and safety reminders so your storage lasts through seasons and makes daily life easier.
1) Deck-Box Bench with Built-In Lid for Cushions and Toys
Intent: practical build-and-use guide.
Choose a deck-box bench when you want seating that hides bulky cushions and noisy toys. You get a dual-purpose piece that keeps gear dry and gives kids a place to sit.
Pick weatherproof resin or cedar for low upkeep and add a soft-close hinge to protect little fingers. A common mistake is underestimating depth—measure cushions and totes before buying or building.
Label internal bins for balls, pool toys, and art supplies so cleanup becomes fast. If you build from plans, follow a step-by-step guide like this deck-box bench plan to fit two storage totes and save time during assembly.
Place the bench near play areas and secure the lid with a child-safe latch. Try it this weekend and see how much neater your backyard looks.
2) PVC Pipe Pool Noodle Rack (Wall-Mounted)
Intent: tutorial — build a simple wall-mounted rack to store pool noodles upright.
You can mount short lengths of PVC pipe to a fence or garage wall and slide noodles in by the end. Cut pipes to 6–10 inch lengths, space them 3–4 inches apart, and screw them onto a wooden batten for strength.
Use capped ends or sand the cut edges so they don’t fray foam. Paint the pipes to match your yard, or label slots for kids to sort colors. A common mistake is spacing too tightly — noodles should slide in easily without bending.
This setup saves floor space and keeps noodles dry and off the grass. Try a test row first and adjust spacing before attaching the full rack.
3) Pallet Toy Shelf with Weatherproof Sealant
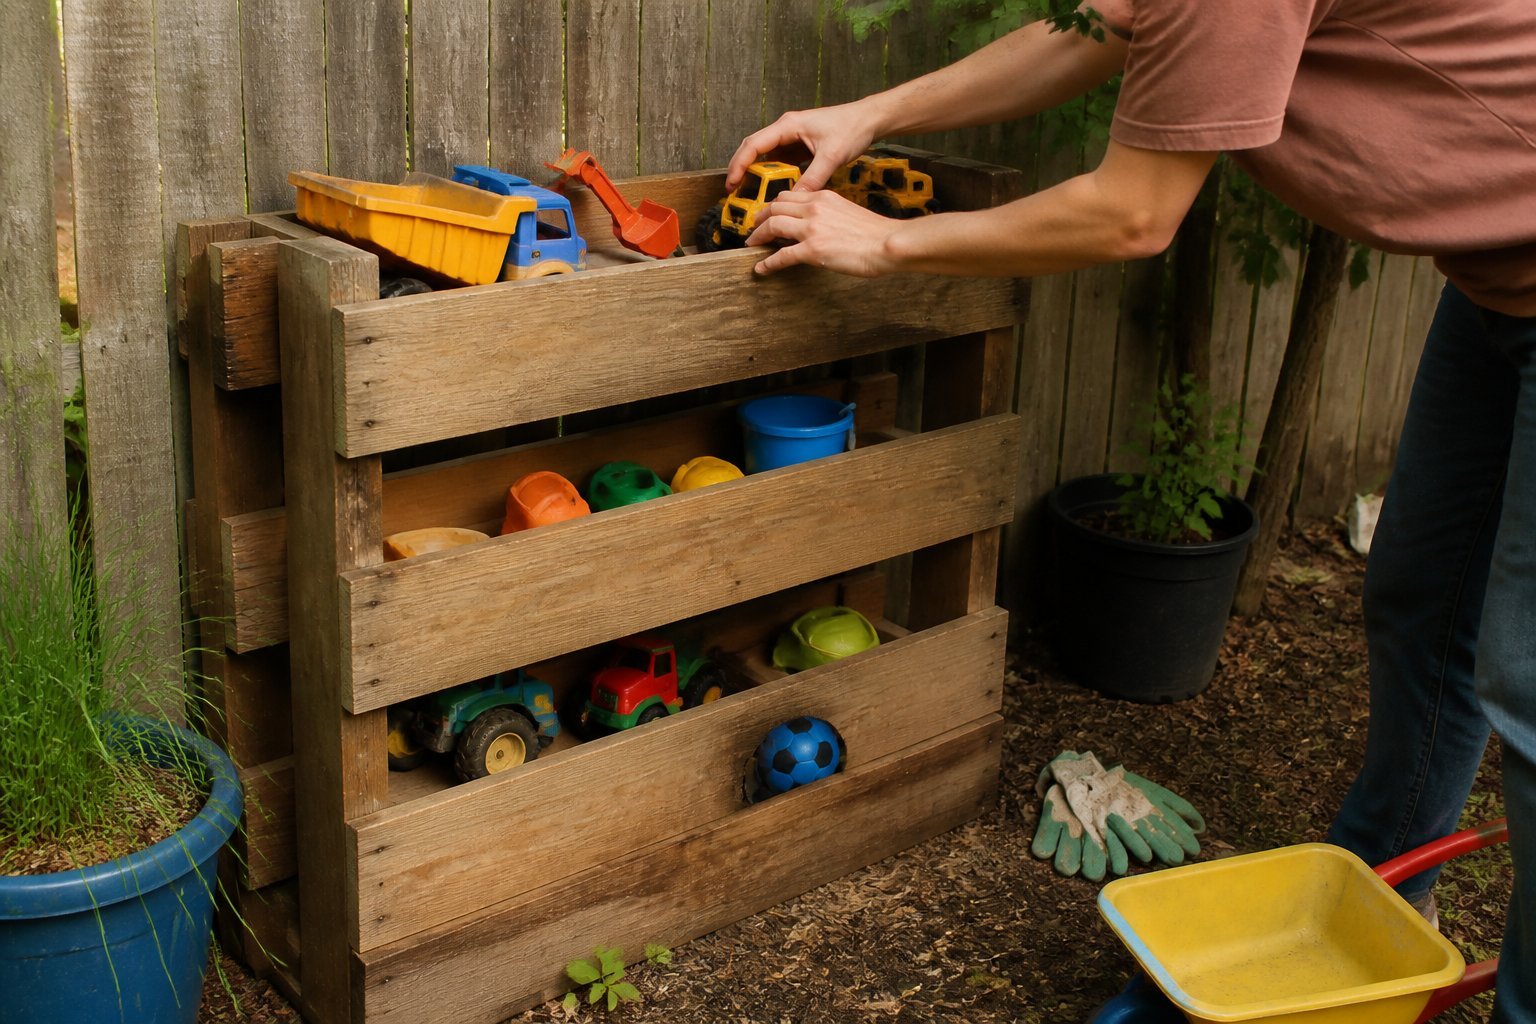
Intent: tutorial. Build a simple pallet shelf to corral balls, trucks, and watering cans, then seal it for all-season use.
Start by choosing a sturdy pallet and sanding rough edges; splinters are the most common mistake. Cut shelves to fit your space, and screw slats firmly so toys won’t shift when kids grab them.
Apply a quality exterior primer, then two coats of marine or exterior-grade polyurethane. Pay special attention to end grain and screw holes; missed spots soak up water fast. Use rubber feet or raise the shelf slightly to avoid ground moisture.
For a cleaner look, paint the front board in a bright color kids will recognize. If you want plans and inspiration, see pallet storage ideas that are easy to build and weather-ready.
4) Outdoor Toy Chest with Gas-Hinge Lid (plastic resin)
Intent: guide. Choose a resin deck box with gas hinges when you want low-maintenance, waterproof storage that opens smoothly for kids and adults. A gas-hinge lid keeps the top from slamming and makes one-handed access easy during playtime.
Look for a chest rated for UV resistance and waterproofing so toys won’t mildew. Pick a size that fits pool gear or cushions; 100-gallon options work well for bigger families. Consider a lockable lid for safety and delivery protection.
Common mistakes: buying a flimsy model without reinforced walls or ignoring hinge quality. Test the lid action; cheap hinges squeak or fail. If the box sits on grass, raise it slightly to avoid moisture wicking.
Example: a resin deck box with hydraulic or gas struts lasts longer and feels premium. Try one on your patio and note how much neater your yard looks after a single weekend of sorting.
5) Rolling Garden Cart Converted into Toy Hauler
Intent: tutorial.
Turn a sturdy rolling garden cart into a mobile toy hauler to speed cleanup and protect toys from rain. Remove one side panel for easy access, add bungee hooks and a weatherproof tarp, and line the base with non-slip matting so items stay put on bumpy grass.
Use divided crates or removable bins to keep balls, shovels, and pool toys organized. A common mistake is overloading the cart—keep weight low and centered to avoid tipping. If your cart has a metal frame, touch up exposed welds with rust-proof paint to extend life.
Try smaller runs first to find the best load and tarp tension. Once it works, you’ll reach for the hauler every time cleanup starts. Grab a cart and test one weekend—your yard will look tidier and cleanup will feel faster.
6) Hanging Mesh Toy Hammock for Balls and Floats
Intent: tutorial. Hang a heavy-duty mesh laundry bag or net between two hooks to keep balls and floats off the deck and drying. Space the hooks so the hammock sits taut; that prevents sagging and keeps water from pooling.
Use stainless-steel or coated hooks and outdoor-rated rope or straps. Drill into studs or use heavy-duty fence-post anchors for a secure hold. A common mistake is using weak hooks—those will bend under weight and drop everything.
This setup works great under eaves, along a fence, or inside a pool shed. Toss in oversized floats, pool noodles, and beach balls. Check the mesh for tears and rinse mildew-prone items before storing to avoid smells. Clean the hammock yearly and tighten anchors as needed.
7) DIY Wall-Mounted Bike and Scooter Rack
Intent: tutorial and guide.
Mount a simple vertical rack to free floor space and keep wheels off wet grass. Use 2x4s or reclaimed wood, add angled hooks for front wheels, and leave a shelf above for helmets and pumps.
Start by marking studs and spacing racks so handlebars don’t clash. A common mistake is using drywall anchors alone—bikes are heavy and will pull free over time. Fasten to studs with long lag screws for safety.
If you want a cleaner look, paint the wood and label each spot for a child’s bike. I once built one that fit five bikes and a scooter; spacing saved morning chaos. Add rubber on hooks to protect rims and test weight before regular use.
8) Repurposed Cedar Planter Box with Toy Compartments
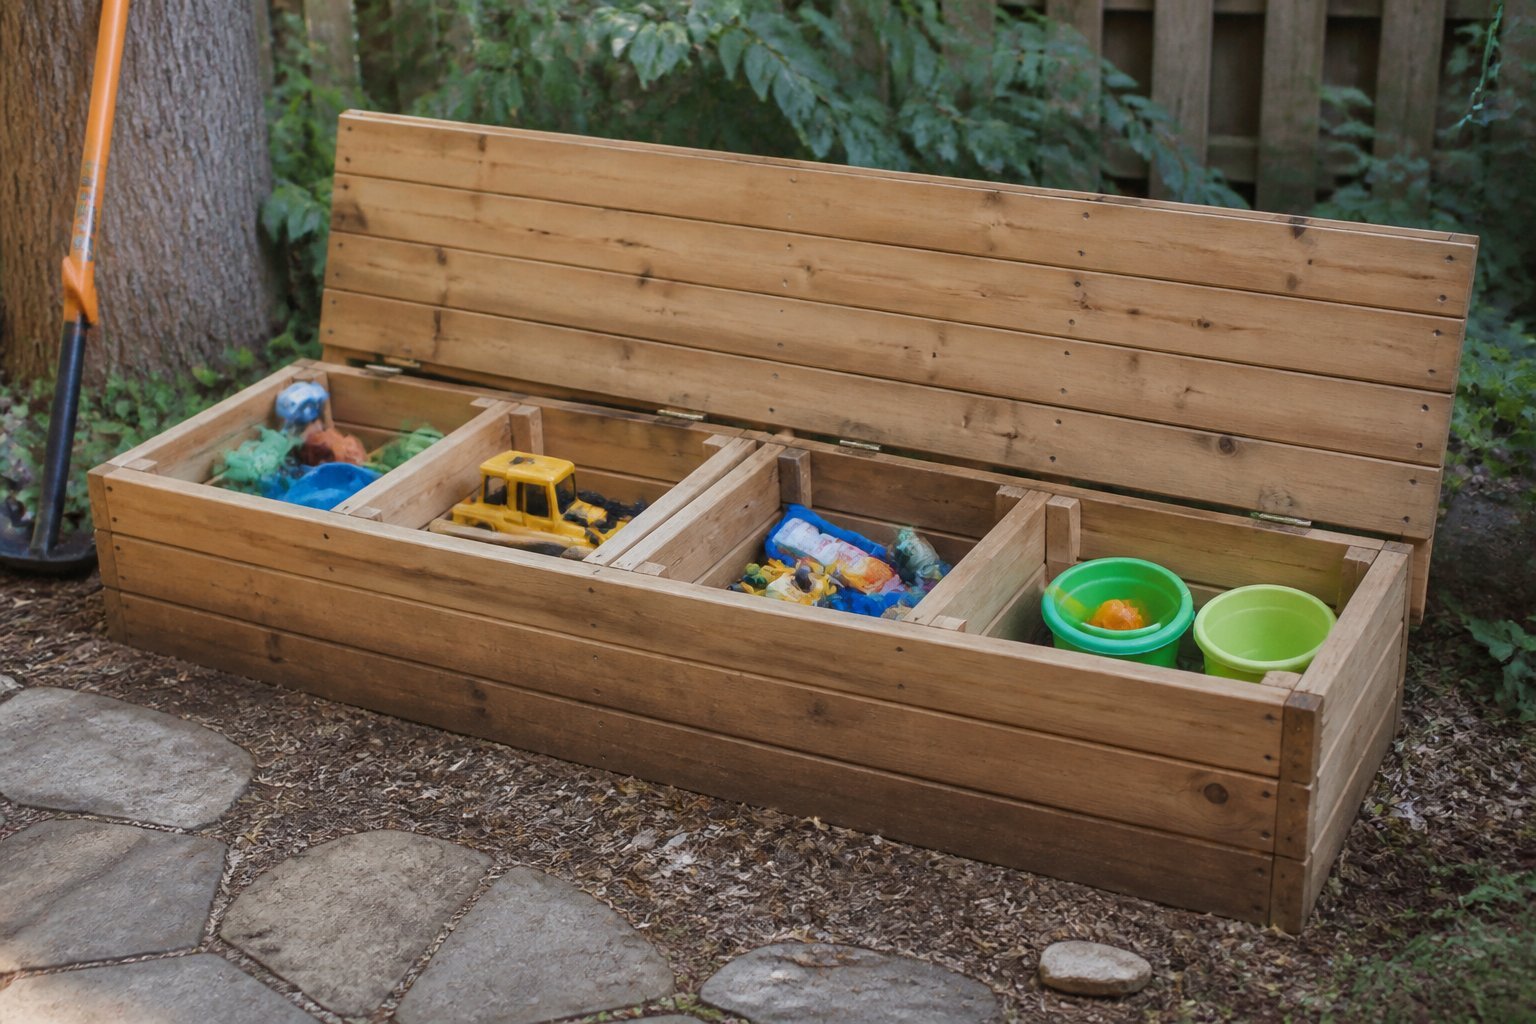
Tutorial: turn an old cedar planter into a smart toy sorter you’ll actually use. Start by removing soil and lining the inside with a plastic tray to protect wood. Then add simple dividers to create compartments for balls, sand toys, and art supplies.
Use cedar because it resists rot and smells good. Cut dividers from scrap cedar or plywood and attach them with screws and exterior glue. A common mistake is making compartments too small; leave space so kids can grab toys easily.
Paint or stain the exterior to match your yard and add rope handles for easy moving. If deliveries or rain are a worry, hinge a lightweight lid for protection. Try one compartment per toy type and you’ll spot the difference fast.
9) Under-Deck Storage Drawers on Sliding Glides
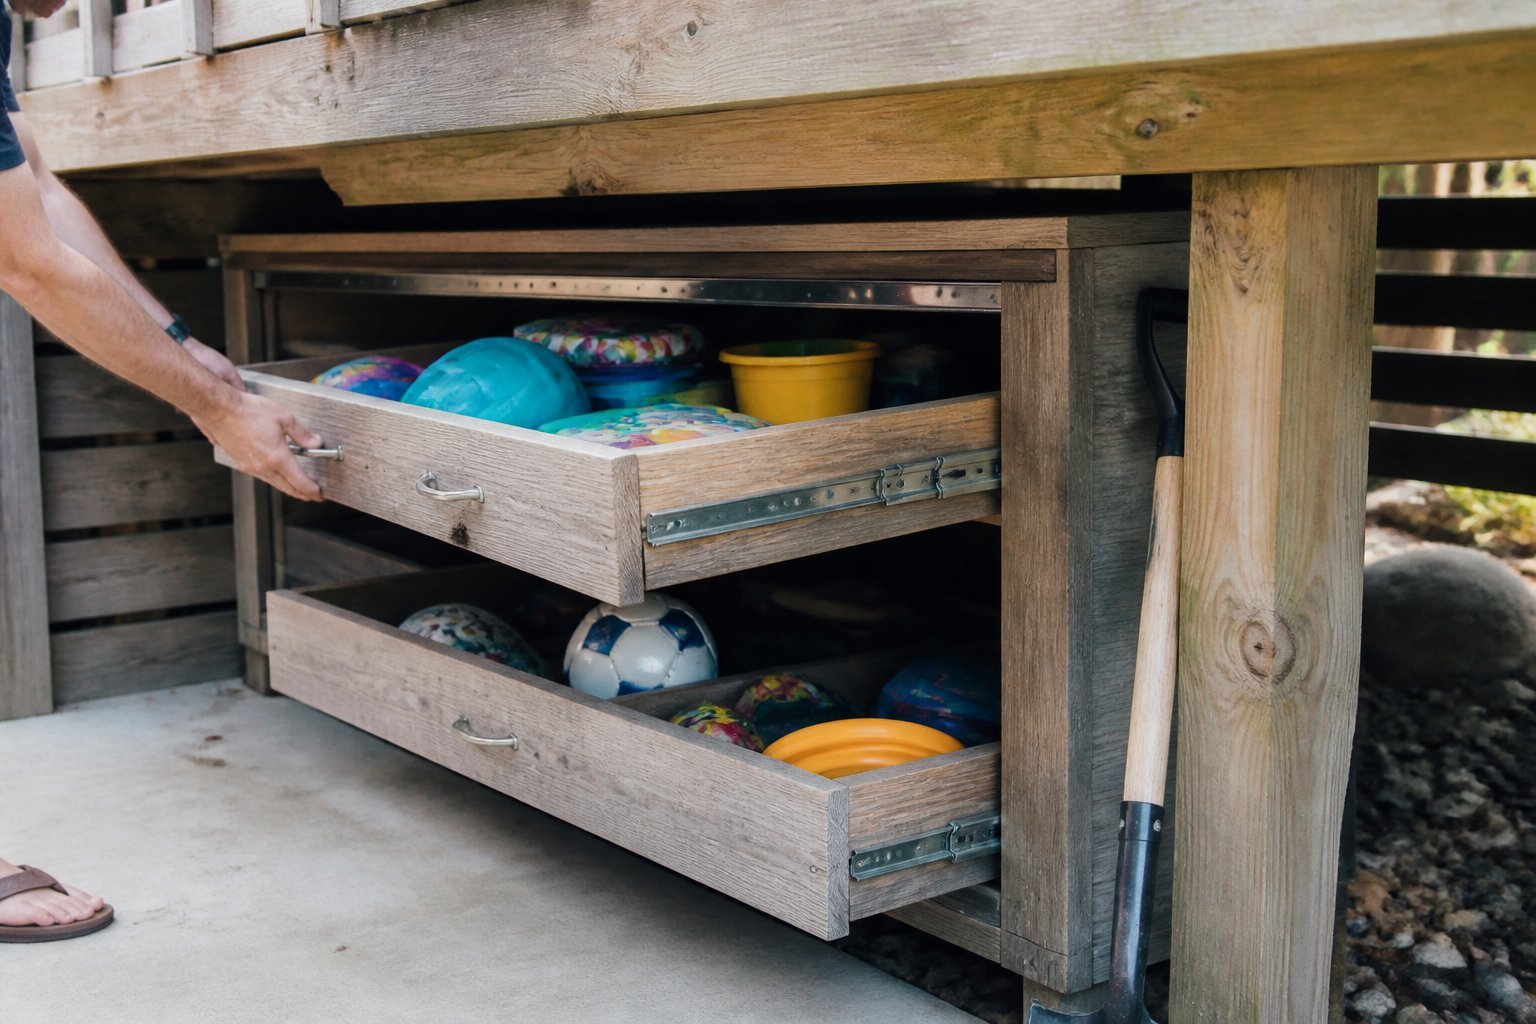
Intent: tutorial. Install sliding drawers under your deck to keep toys out of sight but within reach. These drawers pull out like under-bed storage, so you can grab balls, pool toys, or garden tools without crawling under the deck.
Start by measuring the space and planning drawer widths to avoid joist interference. Use weather-resistant plywood and marine-grade glides; cheap hardware will bind or rust. A common mistake is cutting drawers too tall—leave ventilation and clearance for deck movement.
Build one drawer first as a test fit. Label it for toys and test how it slides when loaded; a 200–250 lb rating handles most family needs. Finish the face to match your deck for a seamless look. Try this simple upgrade and you’ll notice less clutter in minutes.
10) Upcycled Tire Stack Storage for Balls and Buckets
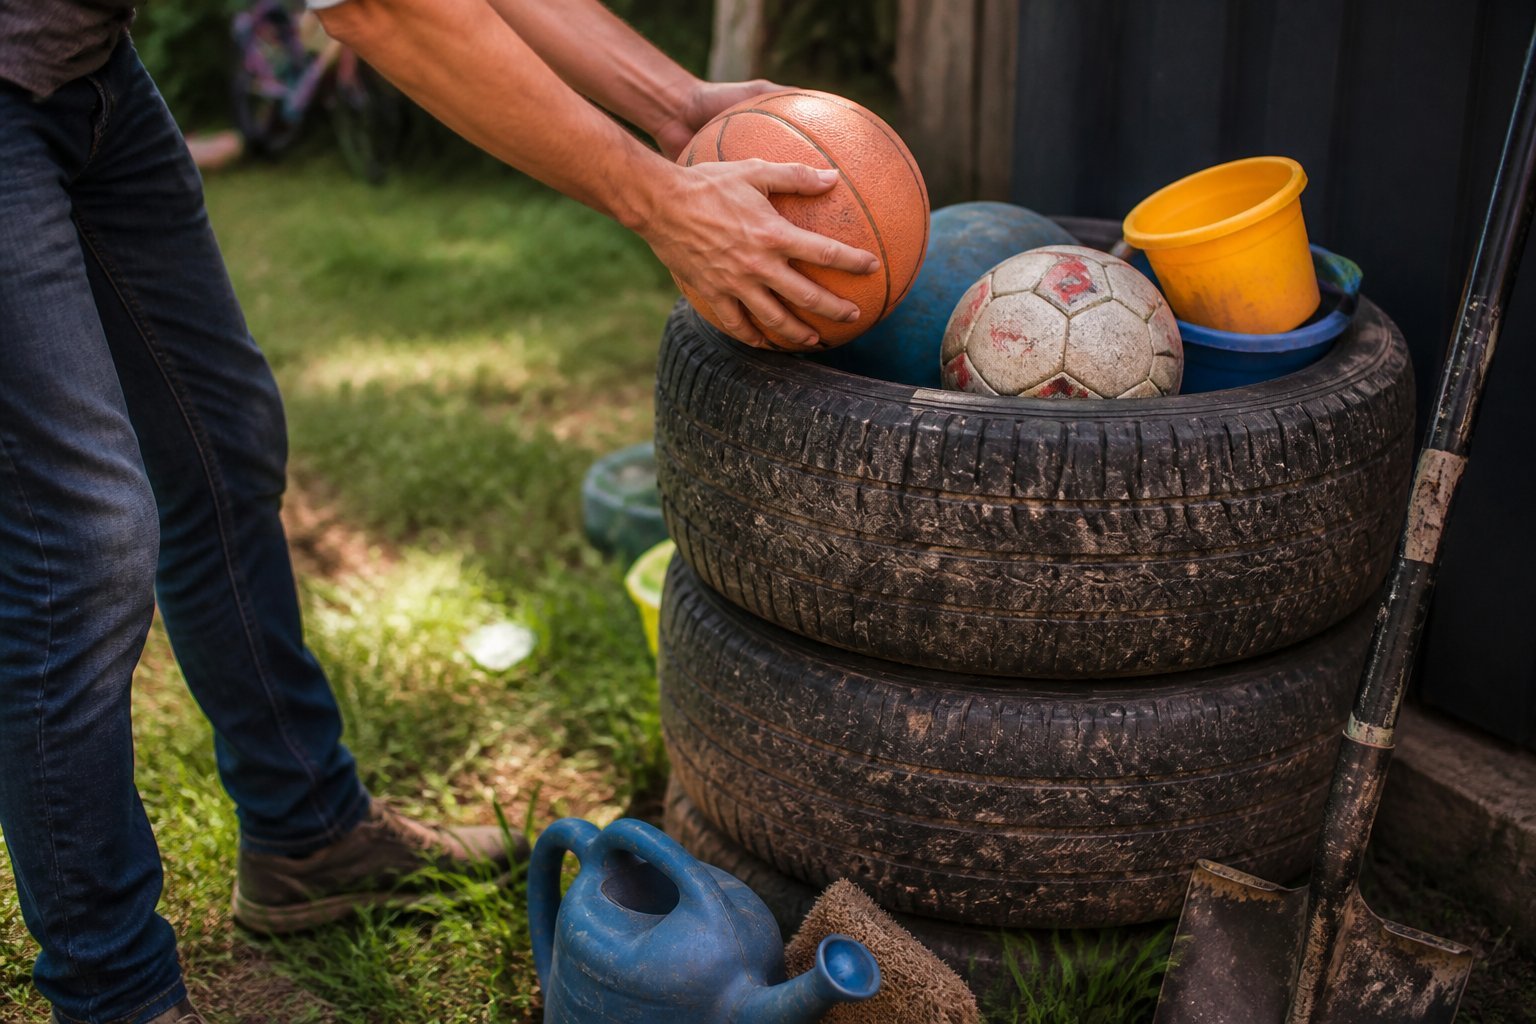
Turn old tires into a simple, weatherproof storage tower you can build in an afternoon. This is a hands-on guide: stack cleaned tires, secure them with a threaded rod or carriage bolts, and paint each ring a bright color so kids can spot their balls fast.
Place the stack near the play area and anchor it to the ground to prevent tipping. A common mistake is skipping drainage holes — drill a few so water won’t collect and toys won’t mildew.
Use the bottom tire for heavy items like buckets and the top rings for soccer or basketballs. If you want a neater look, add a wooden lid or rope handles. Try one stack by the fence, and watch tidy playtime become your new normal. For more upcycle ideas, see creative garden tire projects (https://www.diyncrafts.com/101345/repurpose/30-creative-ways-to-use-old-tires-in-your-garden).
Understanding Outdoor Toy Organization
You’ll learn why a tidy backyard saves time and protects toys, and what to watch for when planning storage. Practical choices cut cleanup to minutes and keep items dry, visible, and safe.
Benefits of a Clutter-Free Backyard
Intent: guide
A clutter-free yard makes daily routines easier. You’ll spend less time gathering scattered balls, pool noodles, and ride-ons when each item has a labeled bin or hanging spot. That means more time for play and fewer lost pieces.
Keeping toys off the ground also protects them from sun and rain. A well-placed deck box or slatted shelf extends plastic and fabric life by reducing UV and mildew exposure. Kids learn responsibility faster when storage is simple: low bins, clear labels, and picture tags help young children put things away.
Safety improves, too. No tripping hazards for adults or kids running barefoot. Consider grouping heavy items (bikes, scooters) on low hooks and lightweight toys in stackable bins to prevent falls and make cleanup quick.
Common Challenges With Outdoor Toy Storage
Intent: tutorial
Moisture and mold are the top problems you’ll face. Toys left in a damp shed or tightly sealed bin can grow mildew. Use ventilated containers and store wet items separately after rinsing and airing them to avoid ruined toys and bad smells.
Limited space forces choices. Prioritize daily-use toys in easy-to-reach places and seasonal gear in labeled bins stacked higher. Wall-mounted racks and fence-hanging pockets free floor space and keep things visible.
Kid cooperation is another hurdle. Make cleanup a game with color-coded spots, short checklists, or a “five-minute tidy” timer. Expect mistakes: teach one-touch habits like “ball goes to the ball bucket” and reward consistent effort. For long-term success, test storage layouts for a week and tweak locations based on how your family actually plays.
Maintenance and Safety Tips
Keep storage dry, easy to access, and free of hazards. Check seals, fasteners, and lids every season, and keep a simple cleaning routine to prevent mold, rust, and insect nests.
Weatherproofing Your Storage Solutions
Guide: make storage stand up to sun, rain, and snow so toys last longer and stay safe.
Choose materials like rot-resistant cedar or heavy-duty plastic with UV stabilizers. If you use a wooden chest, seal all joints with exterior-grade wood sealant and apply a water-repellent finish every 12–18 months. For plastic or metal boxes, add silicone weatherstrips to lids to keep water out and replace cracked seals immediately.
Elevate boxes 1–2 inches off the ground with treated lumber or concrete pavers to prevent bottom rot and improve drainage. Use breathable covers for large items so condensation won’t build up; avoid fully sealed tarps that trap moisture. Anchor tall racks and chests to a wall or deck with brackets to stop tipping in high winds.
Common mistake: stuffing wet toys inside. Dry swim gear and foam before storing to prevent mildew and foam breakdown.
Regular Cleaning and Inspection Practices
Guide: inspect often and clean smart to catch small problems before they become costly.
Set a quarterly checklist: wipe interiors with a diluted vinegar solution (1 part vinegar to 4 parts water), rinse, and air dry. Check hinges, latches, and casters for rust or looseness; tighten screws and swap rusty hardware for stainless steel parts. Look for pest signs—droppings, chewed plastic, or ant trails—and seal gaps larger than 1/4 inch with caulk or mesh.
Label bins by category to reduce rummaging and accidental damage. Keep a small repair kit nearby: spare screws, weatherstrip, a utility knife, and a compact pump for inflatables. If you find mold, scrub with a baking soda paste and re-seal surfaces before returning toys to storage.
Take 15 minutes each month to scan play areas; catching problems early saves time and keeps kids safer.