10 Outdoor Privacy Screen Ideas to Transform Your Space — Stunning, Easy DIY Inspo
You want a private outdoor space that feels calm and looks polished. Whether your yard feels exposed or your balcony invites too many curious glances, you’ll learn simple, stylish ways to reclaim the space and enjoy more quiet, comfort, and shade.
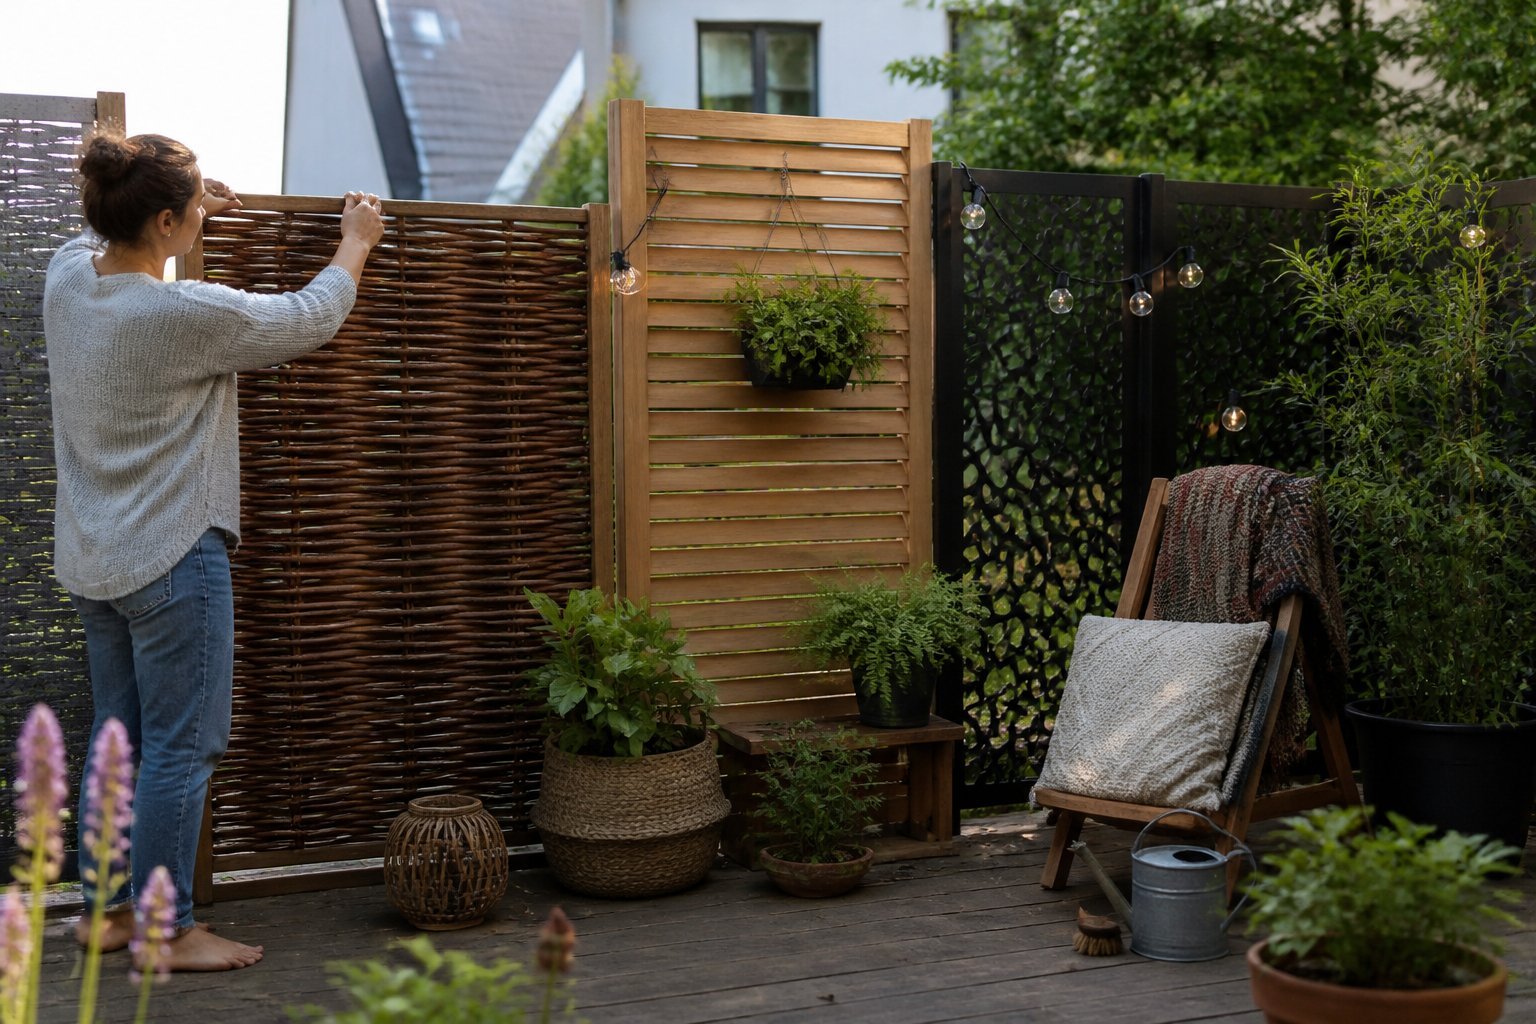
You’ll walk away with practical privacy solutions that match your style, budget, and maintenance comfort—so you can pick the right option and avoid costly mistakes. Expect clear how-to tips, common pitfalls to watch for, and quick examples that show what works best for small patios up to larger backyards.
1) Horizontal cedar slat privacy screen with integrated planter boxes
Idea: build a sturdy cedar screen with horizontal slats and planter boxes to add privacy and greenery. Cedar resists rot and insects, so your screen lasts longer with low upkeep; test a small panel first to match your yard’s tone.
You’ll want planters with drainage holes and enough soil depth for climbing vines or compact shrubs. A common mistake is shallow soil—roots need space to establish or plants will struggle through summer.
Install the screen on a level base and secure panels against wind; heavy planters help stabilize freestanding units. For style, vary slat spacing to control light and sightlines, and train vines to fill gaps over a season.
Try jasmine, clematis, or small boxwoods for quick coverage. Measure twice, pick durable hardware, and plant deliberately—then enjoy your new private, planted retreat.
2) Bamboo roll-up fence panels hung on tension wire
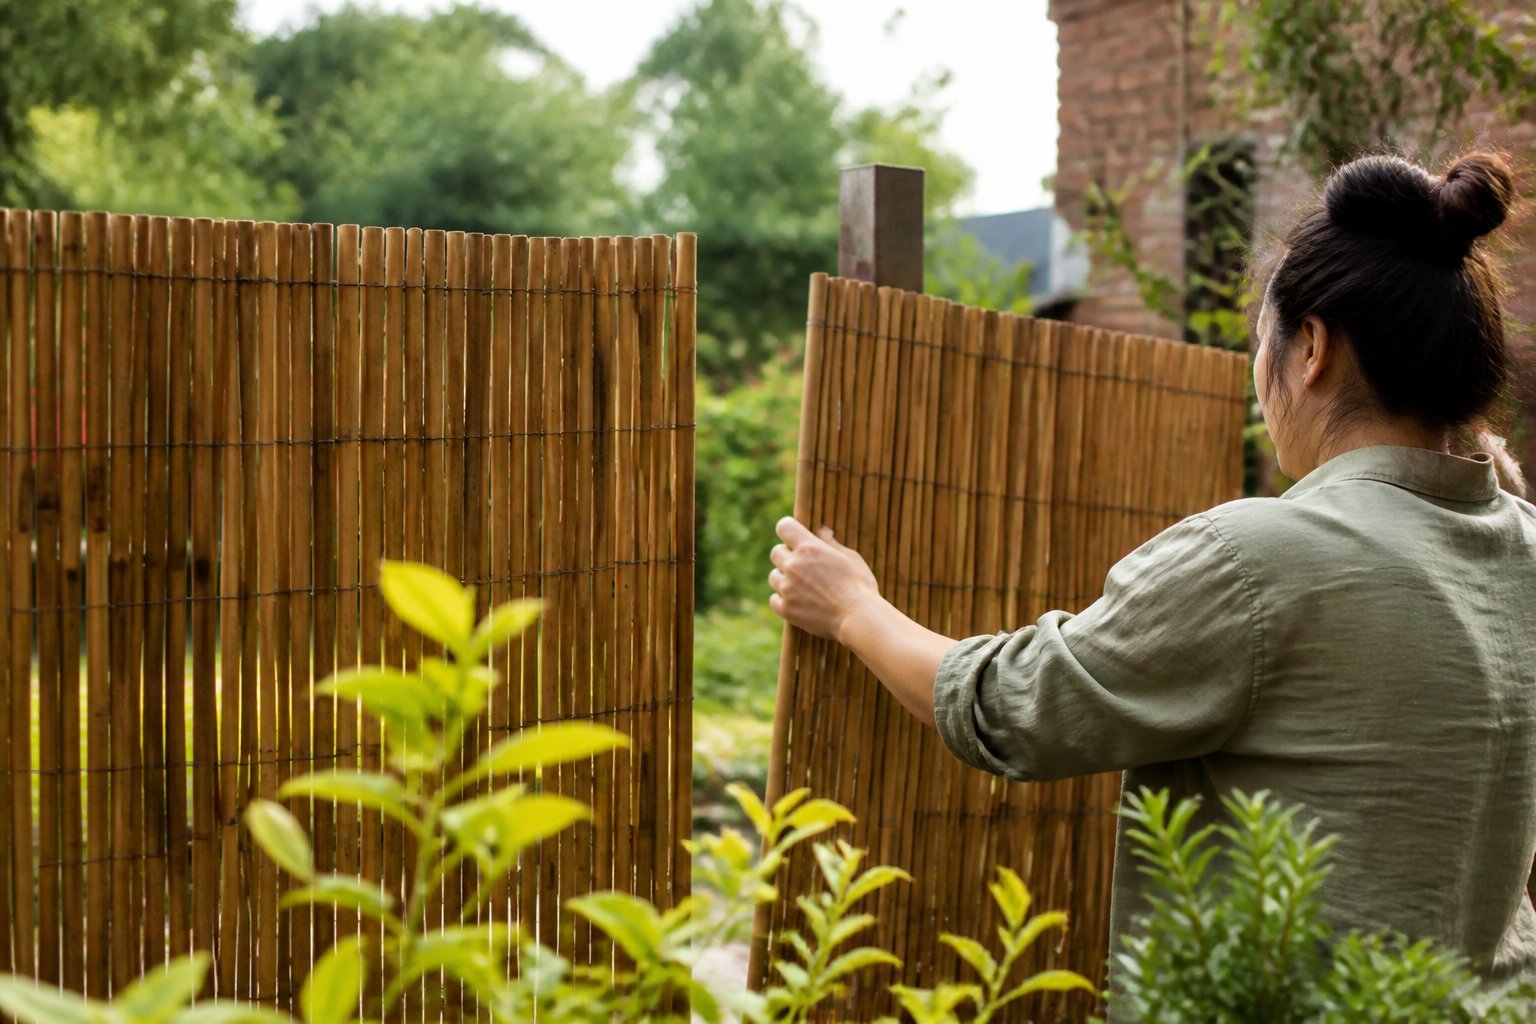
Use this as a how-to idea for quick privacy that still looks natural. You string stainless-steel tension wire between posts, then unroll bamboo panels and secure them with zip ties or metal clips.
Pick panels slightly taller than your existing fence to block sightlines; overlapping rolls hides gaps. Avoid cheap thin panels that fray—choose thicker poles for longer life.
A common mistake is spacing the wire too far apart; the bamboo can sag. Add a middle wire and tighten after a week outdoors to keep the panel flat.
If you mount the wire on a chain-link fence, the bamboo hides the metal while staying ventilated. Try staining or trimming the top for a neater edge and test wind load so panels don’t tear.
3) Louvered pergola panels with adjustable slats
Guide: install and use adjustable louvered panels for privacy and light control.
You can tilt slats to block neighbors, let in breeze, or shed rain. Aluminum systems last longer than wood and need less upkeep, but plan for wind load and drainage.
A common mistake is placing panels too low; you lose airflow and view. Mount them higher and add pull-down screens for evenings or extra privacy, like some kits offer from major retailers.
Think about automation. Motorized louvers let you change settings from a phone during a sudden storm or at sunset. Visit a product page for design and kit options to compare features before you buy.
4) Gabion stone wall privacy divider
Intent: guide — build a durable, stylish divider that doubles as art.
A gabion stone wall gives you immediate privacy and a strong visual anchor. You stack wire baskets and fill them with stones, brick, or recycled concrete to match your yard’s look.
Plan height and footing first; soft ground and frost can shift cages. A common mistake is underestimating drainage — leave gaps or use coarse stone so water won’t pool and panels won’t bow.
You can inset plants or mix different rock colors for a layered effect. For a cozy corner, place a low bench against the gabion and add string lights.
If you want a DIY route, buy pre-made gabion baskets and level each course as you go. Test one section before committing to a long run, and call a pro if the wall will hold soil back.
5) Frosted tempered glass panels in slim aluminum frames
Intent: idea and guide. Choose frosted tempered glass for a clean, modern look that keeps light while blocking views. You’ll get privacy without making the space feel closed in.
Pick slim aluminum frames in powder-coated finishes to match your deck or siding. Aluminum resists rust and stays light, so panels are easier to install and swap later if your needs change.
Common mistake: buying thin glass or untempered panels. Tempered glass is required for safety and won’t shatter into dangerous shards. Ask for frosted toughened glass like the options shown by Dio-Met.
Install posts at solid anchors and check local codes for wind load. If you want more softness, plant tall grasses in front of the panels to add texture and buffer sound.
6) Trellis covered with climbing jasmine (living green screen)
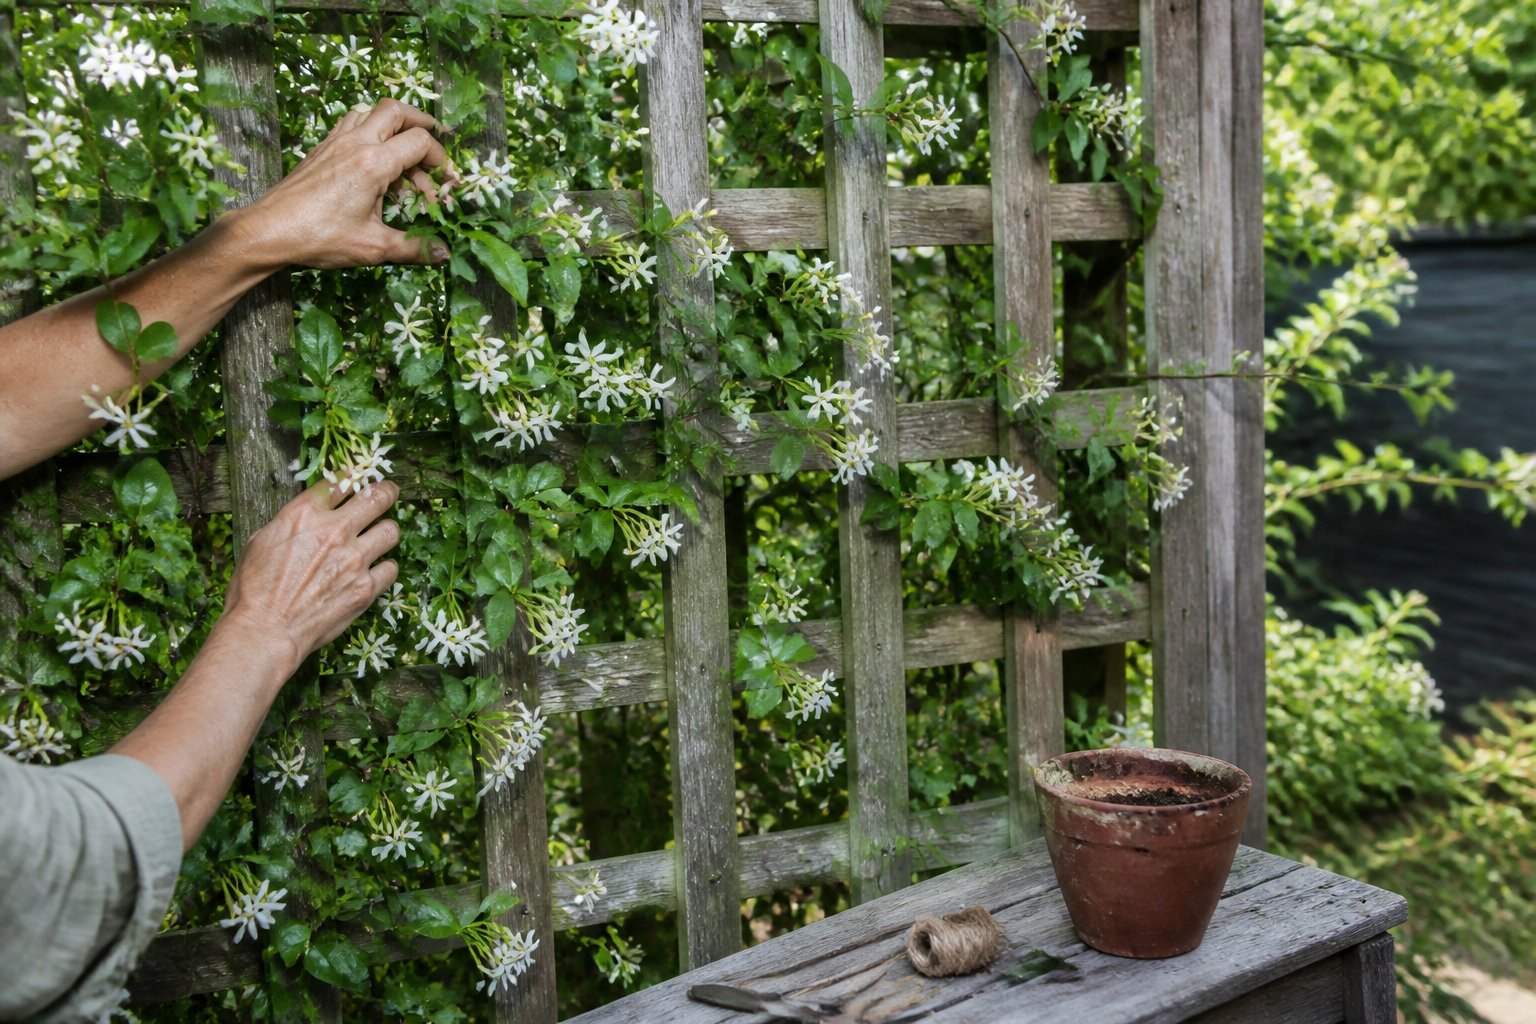
Intent: guide. Use a strong trellis and plant star jasmine or common jasmine for quick, dense cover. Train vines onto a sturdy frame; tie new shoots gently and prune in late winter to keep growth even.
You’ll get fragrant, evergreen screening that softens fences and masks neighbors. Plant in well-drained soil, give morning sun, and water regularly the first year so roots establish.
A common mistake is using weak lattice or spacing posts too far apart — the vine can pull panels loose. Anchor posts deep and attach horizontal wires every 2–3 feet for support.
Think of this as a living wall that improves over time. Start small, check ties each season, and enjoy privacy that smells as good as it looks — try planting a second vine variety if you want staggered blooms.
7) Reclaimed pallet wood accordion folding privacy screen
Intent: tutorial and idea. You can build a simple accordion folding screen from reclaimed pallet boards to add privacy and character to a patio or balcony. Start by choosing straight, dry pallets and stripping nails; warped boards make hinging hard.
Cut panels into equal widths and attach boards to lightweight frames. Use heavy-duty piano hinges between panels so the screen folds flat for storage. A common mistake is using short screws or thin hinges—those fail under wind stress.
Finish with outdoor stain or oil to protect the wood without hiding its patina. Add planter boxes or hooks on the panels to soften the look and hide gaps. Try 3–5 panels for most patios; test the fold in place before final fastening. Measure twice, hinge once, and then enjoy the privacy and character you made yourself.
8) Canvas outdoor curtains on a stainless-steel rod
Idea: hang heavy canvas panels on a stainless-steel rod to add privacy and long-lasting support. You get a clean, modern look that resists rust and holds weight without sagging.
Start by measuring twice and choose grommet-top curtains sized to overlap at the center. Mount the rod into studs or use rated brackets; screws into thin trim will bend or pull out over time.
Choose a canvas with a water-resistant finish and UV protection for longer color life. A common mistake is buying indoor fabric or thin rods that bow in wind — invest in thicker canvas and a 1″ stainless rod.
For a finished touch, add tiebacks or snap-on weights at the hems to reduce flapping. If you need help picking hardware, check this guide on how to hang outdoor curtains.
9) Corten steel decorative laser-cut privacy panel
Intent: idea — choose a dramatic, low-maintenance screen that ages beautifully.
A Corten steel laser-cut panel gives your yard instant character and durable privacy. You can pick geometric or nature patterns to match your style, and the steel weathers to a warm, rusted finish that hides scratches and fingerprints.
Buy panels sized for your opening or order a custom cut to avoid awkward gaps. Install on a simple frame or bolt to posts; a common mistake is under‑sizing the frame, which causes wind wobble and noise.
Pair a Corten panel with backlighting to cast patterned shadows at night. Check suppliers for laser-cut options and finishes, such as those from this collection of Corten steel garden screens. Consider drainage and planting nearby to keep soil from staining the base.
10) Modular composite decking privacy panels (weatherproof)
Intent: idea and guide.
You can install modular composite panels to add privacy without heavy maintenance. These panels snap into frames, resist rot, and survive sun and rain so you won’t repaint every year.
Pick a pattern that matches your deck style; simple slats hide neighbors, while decorative cutouts add light. Measure carefully—common mistake is buying panels that don’t fit existing posts. Leave gaps for airflow to prevent mildew.
Think about DIY vs. pro installation. Many systems fit with basic tools, but uneven siding or old posts may need a contractor. For ready-made options and design patterns, check this selection of decorative outdoor privacy panels.
Try a small test run on one section to confirm color and spacing before committing to the whole deck. If you’re ready, pick panels that match your budget and climate, then start transforming your outdoor space.
Key Considerations for Outdoor Privacy Solutions
Choose options that last, fit your space, and match your daily routine. Think about what you want to hide, how close neighbors are, and how much time you will spend maintaining the screen.
Materials and Durability
Intent: guide — pick materials that hold up where you live.
Wood looks warm but can rot or warp. Cedar and redwood resist decay and pests better than pine. If you like wood grain without the upkeep, consider composite panels that mimic wood and need no staining.
Metal options like powder-coated steel or aluminum resist insects and do well in wet climates. They can rust if the finish chips, so check for solid coatings and warranty details.
Fabric screens and bamboo are affordable but degrade faster in sun and wind. Use UV-rated outdoor fabric and replace ties or grommets yearly. For coastal sites, salt spray favors stainless steel, aluminum, or marine-grade fasteners. Match fasteners to the material to avoid galvanic corrosion.
Common mistake: choosing a material solely for looks. Test a sample in place and ask about expected lifespan before you buy.
Placement and Installation
Intent: tutorial — plan exact location and method for best results.
Measure sightlines from neighbors’ windows and main outdoor seating. Install taller panels where privacy matters most, like around patios or hot tubs. Set posts in concrete for stability in windy areas; use post anchors for deck-mounted screens.
Consider hinge or sliding systems if you need occasional access. Leave a small gap at the bottom—about 1–2 inches—to allow mowing and drainage. When attaching to fences, reinforce existing posts if they’re older than 10 years.
If you rent, choose freestanding or tension-mounted options to avoid permanent holes. Hire a pro for heavy materials or complex gates. Poor anchoring is the top cause of screen failure during storms.
Climate and Maintenance Needs
Intent: guide — match care routine to your local weather and schedule.
In hot, sunny climates, pick UV-resistant fabrics and finishes. Expect annual sealing or staining for wooden panels. For metal, wash salt and pollen off monthly in coastal or high-pollen areas to prevent surface damage.
In rainy or humid regions, leave airflow behind screens to prevent mold. Use rot-resistant wood and stainless fasteners. Check for standing water after storms and regrade soil if pooling occurs.
Windy sites need deeper footings or wind-permeable designs like slatted panels or lattice. These cut wind load and lower repair costs. Set a simple maintenance schedule: inspect fasteners every six months, clean surfaces seasonally, and replace worn fabrics as needed.
Design Integration for Seamless Outdoor Spaces
Plan how each screen will sit in your yard and what function it must serve. Think about sightlines, wind direction, and how people will move through the space before choosing materials or placement.
Blending with Landscape Features
Guide the viewer’s eye by placing screens near existing elements like hedges, large stones, or a pergola. Match screen height to nearby plants—use 5–6 ft slats beside medium shrubs and taller trellises where trees rise. Plant fast-growing climbers such as star jasmine or clematis at the base of lattice to soften edges within one growing season.
Common mistake: installing a freestanding panel far from any planting so it looks like an afterthought. Instead, stagger screens with planting beds or align them with a garden path to create a natural flow. Use irregular spacing or mixed materials (wood plus living wall) to echo shapes already in the yard.
Architectural Cohesion
Tie screens to your home by repeating key architectural lines. If your house has horizontal siding, choose horizontal slats for the screen. For a modern brick façade, use slim metal panels with a powder-coat finish that matches window frames.
Pay attention to scale: a thin lattice can disappear next to a two-story wall, while a thick timber panel can overpower a small porch. Mount one end of a screen to an existing post or wall to look intentional. If you need inspiration, study the way eaves, railings, and window trim use color and proportion and copy those cues.
Color and Texture Choices
Pick colors that relate to both the house and the garden. Use muted greens or warm grays to let plants stand out. For wood, choose stain tones that match decking or fence boards, not just the new panel alone.
Texture matters as much as hue. Smooth metal reads modern; rough cedar reads rustic. Mix one smooth surface with one textured surface to avoid monotony—try a metal panel next to a woven reed screen. Test paint or stain on a small board and view it at dusk to see how shadows change the look.